
Printing labels & receipts
Connect a thermal printer from an iPhone, Android phone, or computer, and set the paper size your packing labels and receipts print on.
Kiosku prints two documents: a packing label for whoever packs the order, and a receipt for your customer. Both come out as a black-and-white PDF sized for your printer's paper, so any thermal printer that can print a PDF works — you don't need a printer made for Kiosku.
Set your paper size once, then pick the section below for the device you print from.
Set your paper size
Go to Store settings → Printing → Printer paper (open it in your dashboard) and choose a Paper size. Only the store owner can open Store settings.
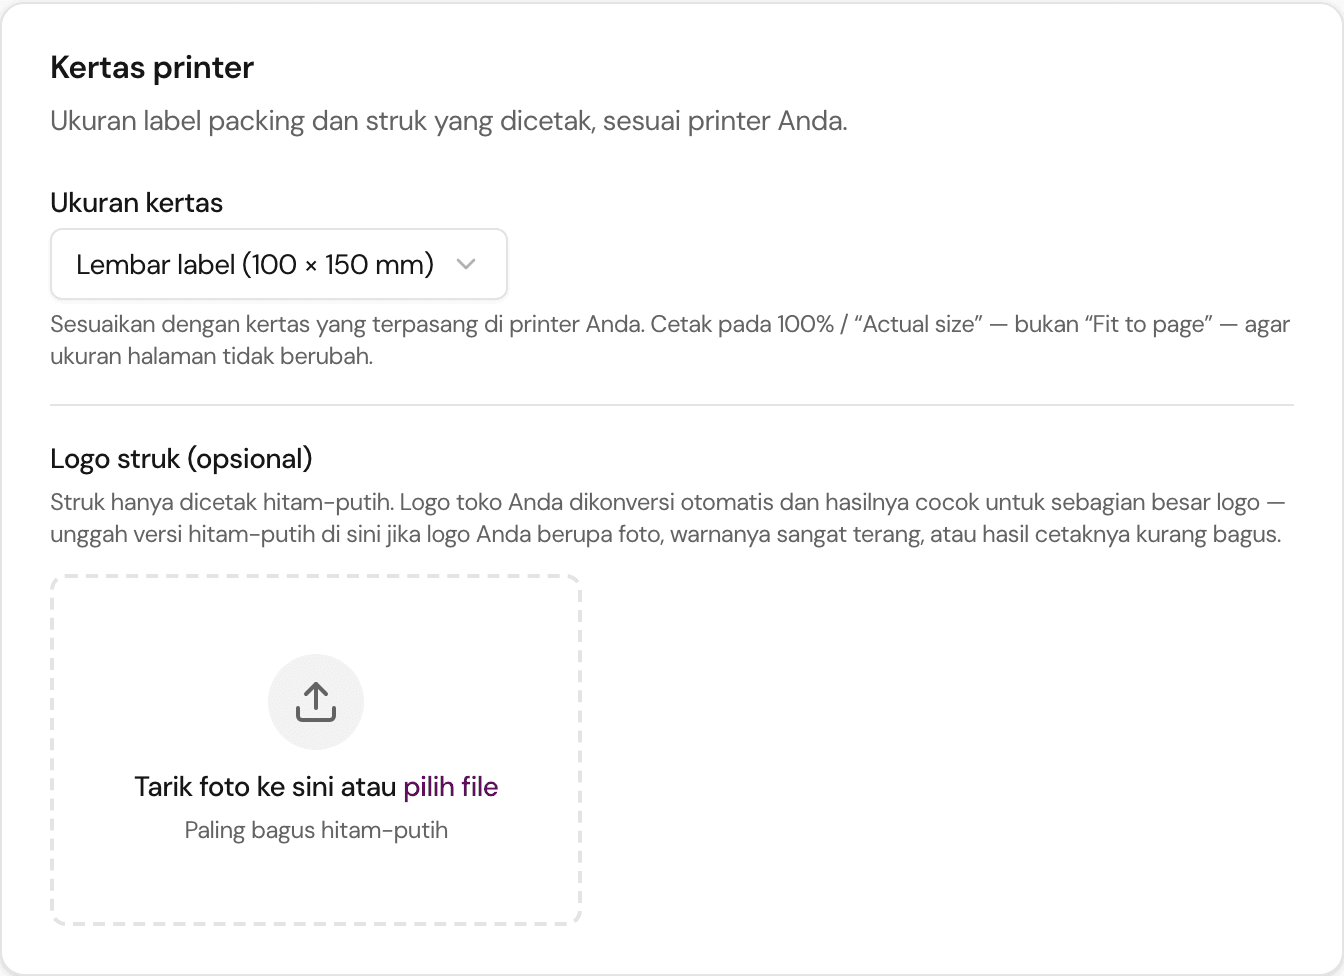
- Thermal receipt roll (57 mm) — for the small handheld or countertop printers that take a roll of 57 or 58 mm paper. The print is 48 mm wide (the part of a 58 mm roll a printer can actually print on), and each label or receipt is only as long as its content, so the printer cuts or tears after the last line.
- Label sheet (100 × 150 mm) — for label printers loaded with 100 × 150 mm sticker labels (the common shipping-label size). Every label is exactly one sticker. A receipt too long for one sticker continues onto the next, with your store name repeated at the top.
Save the change. It applies to both packing labels and receipts, because they print on the same printer.
If you've never changed this setting, your store uses Label sheet (100 × 150 mm). Printing that on a 57 mm roll gives a tiny, shrunken label — switch to Thermal receipt roll (57 mm) first.
Receipt logo (optional), on the same card, controls the logo at the top of your receipts. Thermal printers print only black and white, so Kiosku converts your store logo automatically. That suits most logos. If yours is a photo, very light, or prints badly, upload a black-and-white version here and receipts use it instead.
Where to print from
- One order: open the order and tap Packing label or Receipt.
- Many orders at once: on the To Do page, open the Prep tab. Each day has its own ⋯ menu: choose Print labels or Print receipts. The batch includes that day's orders, in the order shown on screen. The (A–Z) versions print the same orders sorted by recipient name.
Receipt only appears once an order has been paid online, or once you've moved it past Pending (for example to Verified). An order whose payment was refunded, failed, expired, or cancelled never gets a receipt; when you print a batch, Kiosku skips those orders and tells you how many it left out.
Either way, the PDF opens in a new browser tab. What you do next depends on your device.
iPhone and iPad
Most small Bluetooth thermal printers don't support AirPrint, so the iPhone's own Print option can't find them. Print through an app instead. We recommend Thermer, which we've tested with Kiosku labels on a 58 mm printer. Your printer brand's own app also works if it can print a PDF.
Thermer
Listed in the stores as Bluetooth Thermal Printer App. Free, with optional in-app purchases.
- Install Thermer (or your printer brand's app) from the App Store.
- Turn the printer on, open the app, and connect to the printer from inside the app. Many of these printers never show up under Settings → Bluetooth, and that's normal.
- In Kiosku, tap Packing label or Receipt. The PDF opens in Safari.
- Tap the Share button, then choose the printing app. If it isn't in the row of apps, scroll to the end and tap More.
- In the app, check the paper width is set to 58 mm, and print.
If your printer does support AirPrint, skip the app: tap Share → Print and choose the printer.
Android
- Turn the printer on, then pair it under Settings → Bluetooth (or Connected devices). If it asks for a PIN, try
0000or1234, or check the printer's manual. - Install a printing app and select the printer in it. Thermer (see iPhone and iPad) is on Google Play too. RawBT is another option: it adds your printer to Android's own Print menu.
RawBT
Listed on Google Play as RawBT inkless print service.
- In Kiosku, tap Packing label or Receipt. Depending on your browser, the PDF either opens or downloads — if it downloads, open it from the notification.
- Tap Share and choose the printing app. If you use RawBT, you can instead choose Print and pick your printer.
- Check the paper width is set to 58 mm, and print.
Computer
On a laptop or desktop, the printer is an ordinary system printer:
- Connect the printer over USB (or pair it over Bluetooth) and install the driver from the printer maker's website. On a Mac, add it under System Settings → Printers & Scanners; on Windows, under Settings → Bluetooth & devices → Printers & scanners.
- In Kiosku, click Packing label or Receipt, then open your browser's print dialog from the PDF tab (
Ctrl+P, orCmd+Pon a Mac). - Choose the thermal printer, and set:
- Paper size to match your Kiosku setting — a 58 mm roll size, or 100 × 150 mm (it may be listed as 4 × 6 in). If the size you need isn't listed, add it in the printer driver's settings.
- Scale to 100% or Actual size — never Fit to page, which shrinks the label.
- Margins to None, if the dialog offers it.
Most browsers remember these choices for the same printer, so you set them once.
If the print looks wrong
- Tiny print with wide blank edges: the paper size in Store settings doesn't match the paper in the printer, or the print dialog is scaling the page. Check both.
- Text cut off at the sides: the printing app or print dialog is set to a wider paper than the roll. Set it to 58 mm.
- The logo prints as a black block or is barely visible: upload a black-and-white Receipt logo (see Set your paper size).
- A stretch of blank paper after each receipt: the printer or app is feeding a fixed page length. Set it to continuous roll paper, not fixed-length labels.